Wednesday, July 25, 2012

thin lines continued

And this is how the thin lines piece looks now:
I have added appliqued poppies to it - my favorite flower. The fabric I used for this were several pieces out of my handdyed stash.

Monday, July 23, 2012

thin lines

A couple of weeks ago there was an interesting thin line technique published on the ' And then we set it on fire' blog which I wanted to try out. I used a handdeyed dark grey fabric for the thin lines - which were cut at 0,5" - and a multicolored linen which I made last year during a soy wax workshop. I love to have pieced backgrounds for my quilts, so this was a great technique to play with. Here is the result I got:
Okay, the background for my next quilt is now finished. With next blog post I will show you how it continued.

Sunday, July 22, 2012

ALQS7

For the 7th time Kate is organising a quilt swap: ALQS7. I have not participated in all of them, but this time I am in it again. Here are the pictures of the quilt I made for this swap:

Background is an ice dyed parfait. The gingko leaves are made from different commercial batiks. Size is 12"x12", title is 'Funky Gingko Leaves'.

Wednesday, July 18, 2012

Sky continued

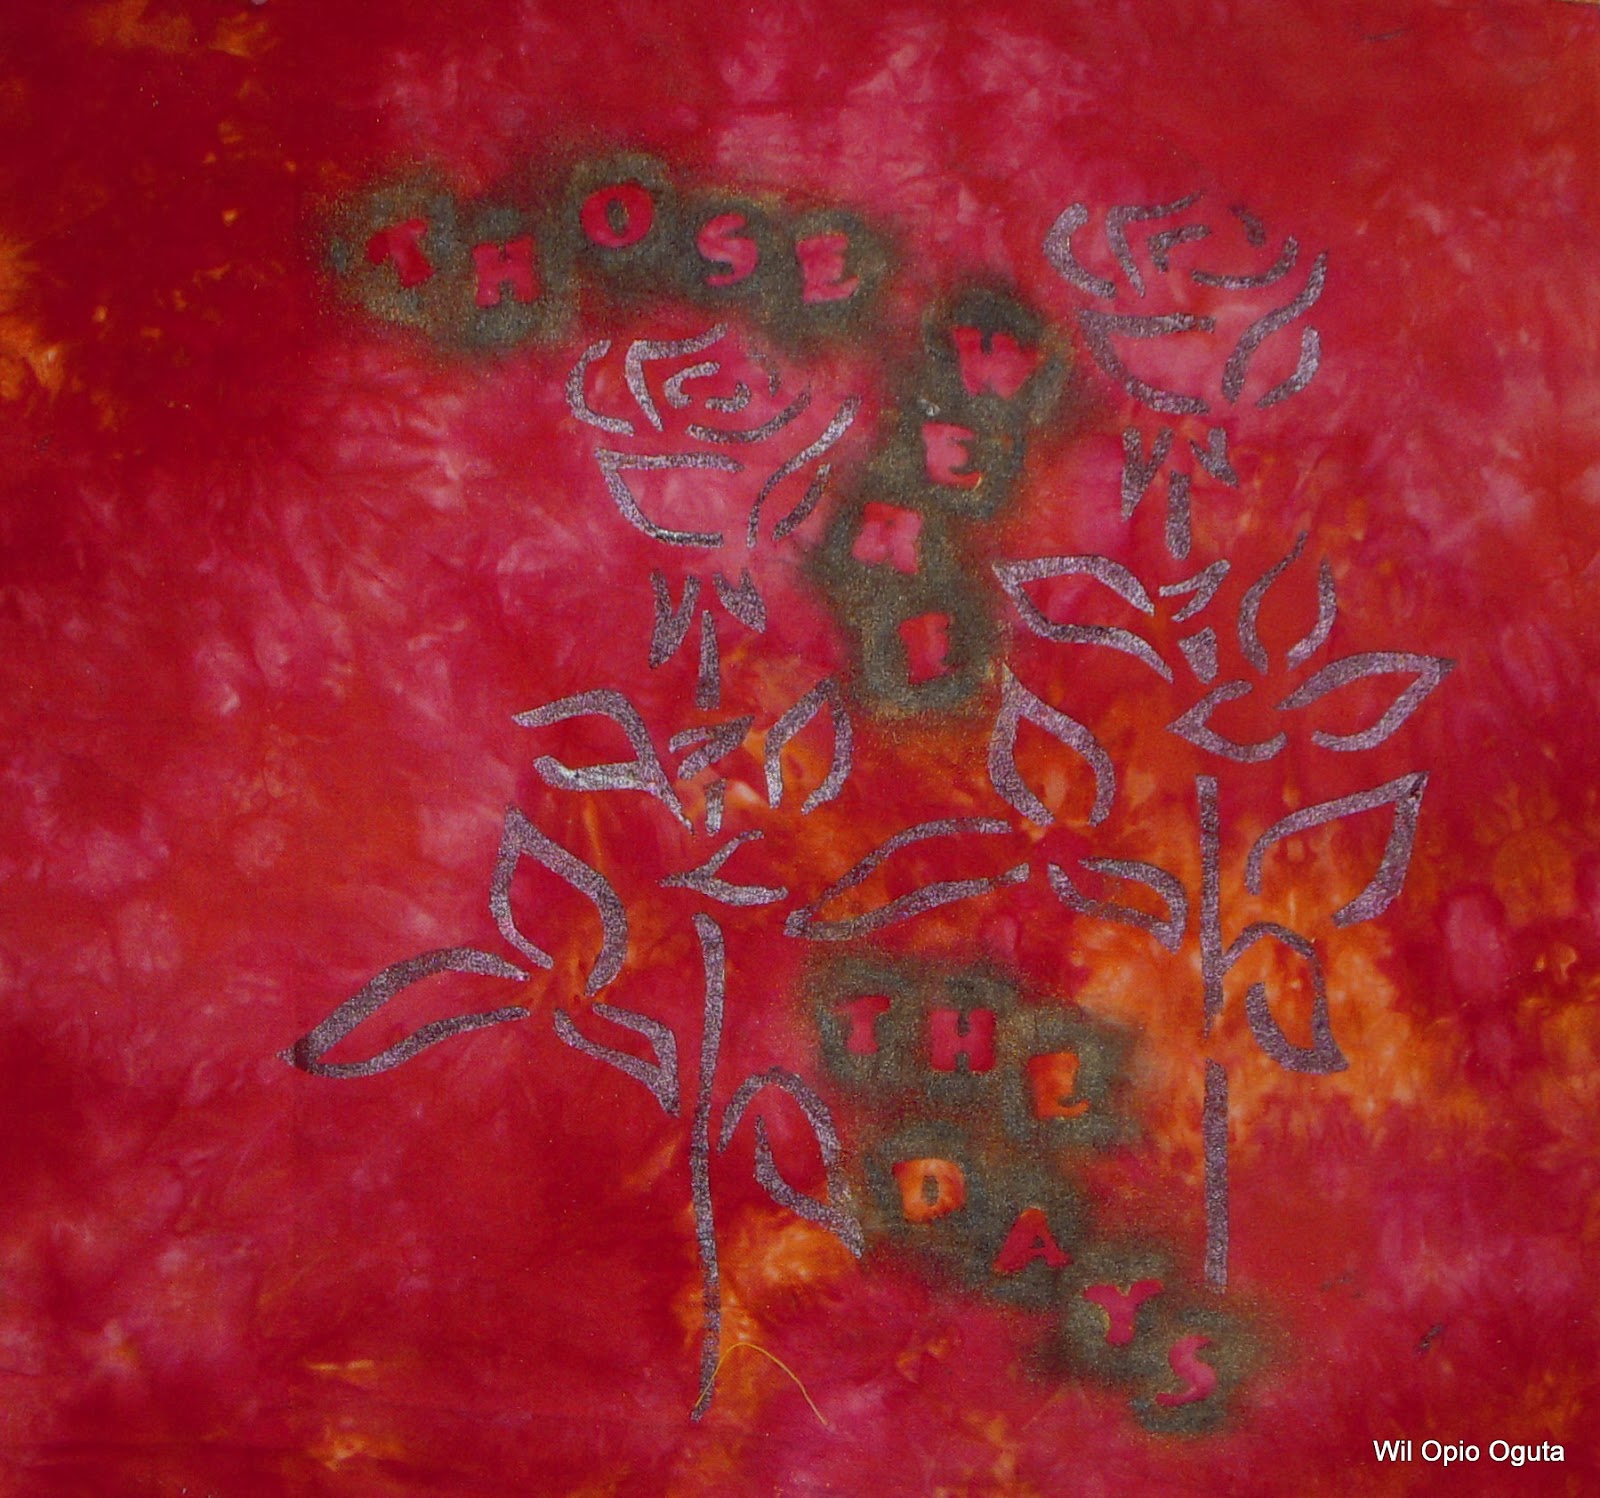
 After painting the roses I placed little foamy letters on the fabric and used charcoal paintsticks to outline the text of Those were the days. This had to cure for 2 days:
When all this was done, it was time to add a backing and batting to it. I used a - at least for me - new method of doing this. I pinned 2 layers of fabric together - front sides facing each other -, stitched this at exactly the size of 12"x12", leaving just a small opening for turning it around. Added the batting and turned the quilt. Stitched a straight line at 1/4" of the edge and the quilt was ready to be quilted.
Quilting is minimal on this piece. I just outlined the shapes of the roses and all the letters with a single straight stitch. This gave me several hundreds of thread ends to get rid off, but I did not want to see connecting stitches. After this was done, it was time for the final part: adding the wineglass. For this I used a small piece of rust dyed fabric. The marking on the fabric was just perfect for the white wine. Stitched this on top of a piece of organza. Placed the other part of the organza on top of it and stitched the glass on to the quilt. Using a candle flame I burned the edges of the fabric to stop/prevent fraying. And this is the final result:

Saturday, July 14, 2012

new Sky theme

Although I just finished  a quilt for the Sky group, the new theme: ' Those were the days of wine and roses' gave me some ideas and I started playing with them. The theme is the title of a movie, but I decided to take the theme more literally. Th first step for this quilt was to make templates of the silhouette of roses and iron these onto a reddish piece of handdyed fabric. I mixed two different Lumiere textile paints so that I got this shimmering dark greyish/purple color and used a spounge brush to apply the paint to the stencil. This is how it looked at that stage:


After the paint had dried, I removed the templates and this is how the result was:

 You have to wait till the next blogpost to see how I continued working on this quilt :-)

Wednesday, July 11, 2012

challenge for Sky

For Sky we have a quarterly challenge. This time the theme was 'Dreams'. I translated this into this quilt which represents my dream of living in a red barn in the middle of nowhere. In reality I live in a town in a small crowded country. Well as long as I cannot retire - or win the lottery - this will be my dream :-).
For the barn and the sky I used handdyed fabrics, windows are made from mulberry bark and for the other parts I used commercial batiks. Size is 12"x12".

Sunday, July 08, 2012

ice cube parfait dyeing

The cable to connect my camera to the computer is still missing, but luckily we discovered that the printer accepts the memory card so at least I am able to upload pictures. Shamefully I have to admit that this is the first dyeing I have done in months. It is a variation of parfait dyeing. In this case I used 3 fat quarters, dye powder in different yellow, green and blue and ice cubes. As with every parfait the first piece of fabric was crunched into the glass vase. Dye powder was sprinkled over it and some ice cubes were placed on top. This whole process was repeated with the 2 other pieces of fabric. I have to add that all fabric was presoaked in soda ash. This is how it looked at that stage:
 After a couple of hours the ice cubes had melted - temperature here is around 100 degrees F - it looked like this:
 And this is how the pieces of fabric looked after the ironing:


I love the effects I got. Parfait with ice cubes  and dye powder give a different effect than using dye concentrate. No doubt I will be using this technique more often in the future.

Thursday, July 05, 2012

embroidery

Slowly I am getting into the creative mood again. I am working on several projects at the same time - took pictures of it, but I have no idea where I put the cable to connect my camera to a computer :-(. Luckily one of my projects is a small one, so I scanned it. Above picture is part of a shibori dyed piece of fabric onwhich I am planning to add lots and lots of embroidery. It will take some time before it is finished. The embroidery you see now, is the result of 2 evenings of working on it. When I can upload my other pictures to the pc I will show them here.