Wednesday, January 28, 2015
Friday, January 23, 2015
grey scale finished
And this is how the finished quilt looks like:
On purpose I kept the quilting simple, wavy lines for the leaf, straight lines for the veins and circular quilting for the holes.
On purpose I kept the quilting simple, wavy lines for the leaf, straight lines for the veins and circular quilting for the holes.
Wednesday, January 21, 2015
Friday, January 16, 2015
grey scale
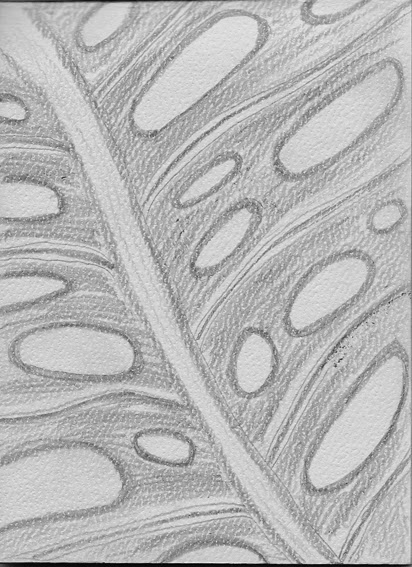
This year I am participating in Elizabeth Barton's Masterclass. The first assignment was about grey scale. I decided to work with a leaf. From the original picture it evolved like this:
original picture
pencil sketch (top left of the main vein is too wide)
first lay out (main vein too straight, other veins too wide)
second lay out (more tweeking of veins is needed)
final lay out
Now I can remove all the pins and glue down the fabric. Next step will be the quilting. As it is Friday I am linking this post to Nina-Marie's Off the Wall Friday.
Wednesday, January 14, 2015
Monday, January 12, 2015
Ugly duckling
This time the ugly duckling is a deconstructed screen print which had too much white showing.
I soda soaked it and accordeon folded it - this time with picture (grin):
And placed it in a glass jar, added ice cubes and a couple of teaspoons seafoam procion dye powder.
After this dye bath it looked like this:
Much work was still needed. Of course you can buy your stamps, but I like to work with unusual objects as stamps. For this fabric I used bubble wrap with teal Golden acrylic and punchinella with Pebeo Setacolor transparent fuchsia.
The colors used in the deconstructed screen printing were red and blue, so I opted to work with similar colors to keep the whole design together.
After the two stamping sessions this fabric still needed more so I decided to give it another dye bath. I used different yellows, one of them was straw the other might have been golden yellow or sun yellow.
This fabric was a difficult one, but I am satisfied with the result. Here is a detail picture:
Friday, January 09, 2015
Ugly duckling 2
Here is another ugly ducling. I don't know anymore how I dyed this piece of fabric, but it did not turn out great:
After I sodasoaked it, I crunched it and placed it in this jar, it is in the middle. I placed ice cubes on it and a couple of teaspoons of rosebud procion dye powder.
This is how it came out. The colors are wonderful now, don't you think?
Although it had greatly improved, I wanted to make it even better. With loofah slices as stamp I started stamping using burgundy Lumiere textile paint.
And a second layer using a bigger slice of loofah and gold nugget metallic Bella paint with this as result:
Isn't it gorgeous?
Wednesday, January 07, 2015
Ugly duckling 1
When you dye your own fabric - even as an experienced dyer - this does not automatically means that you love everything you create. Some pieces of fabric start their life as ugly ducklings, but with some help we can turn them into pretty swans. In the coming 3 blog posts I am going to show you what I did with some of them.
Here is a picture of how the fabric was originally, a clamped shibori:
Here is a picture of how the fabric was originally, a clamped shibori:
I accordeon folded it - sorry no picture - and placed it on top of the other 2 pieces of fabric in this jar, added ice cubes and burnt orange procion dye powder.
The color of the fabric improved, but it still needed more. I used a strip of corrugated cardboard as a stamp and two colors of Pebeo Setacolor transparent: fuchsia and raw sienna.
After the stamping the fabric looked like this:
Much better than how it was, don't you agree? In two days I am going to show you another transformation.
Thursday, January 01, 2015
Special merit
The year starts very well for me :-). I received an email letting me know that my quilt 'Geese on a lake' won a special merit in the Seasons Art Exhibition organised by the Light, Space & Time Online Gallery. Click on this link to see which other pieces were selected. Here is a picture of the Geese:
Subscribe to:
Comments (Atom)


